Today we're going to teach how to use a data extraction tool to scrape a website like Autotrader!
Autotrader is a great website to see multiple car listings from both private sellers and dealerships.
If you're a car dealership, being in the auto industry is very competitive because customers have a high switching cost. Gaining a competitive advantage is important to make a sale.
If you're a consumer, finding the right car to fit your needs and price can be a tedious process with so many different types of cars and dealerships.
For both cases, you can use a free data extraction tool like ParseHub to scrape Autotrader to help you make the best decision.
Today we are going to scrape Autotrader and extract data like model, highlights, specs, price and more.
So let's get into it!
Extracting data from Autotrader
For this example, we are going to extract car data from Autotrader for 2020 Honda vehicles here in Toronto. Will extract the model, highlights, specs, Image URL, price comparison to market and price. We are going to export it as an excel/ CSV or JSON file (we recommend JSON for this project as it’s easier to understand the extracted data).
Getting Started
- Make sure to download and install ParseHub for free. We will use this data extraction tool for this project.
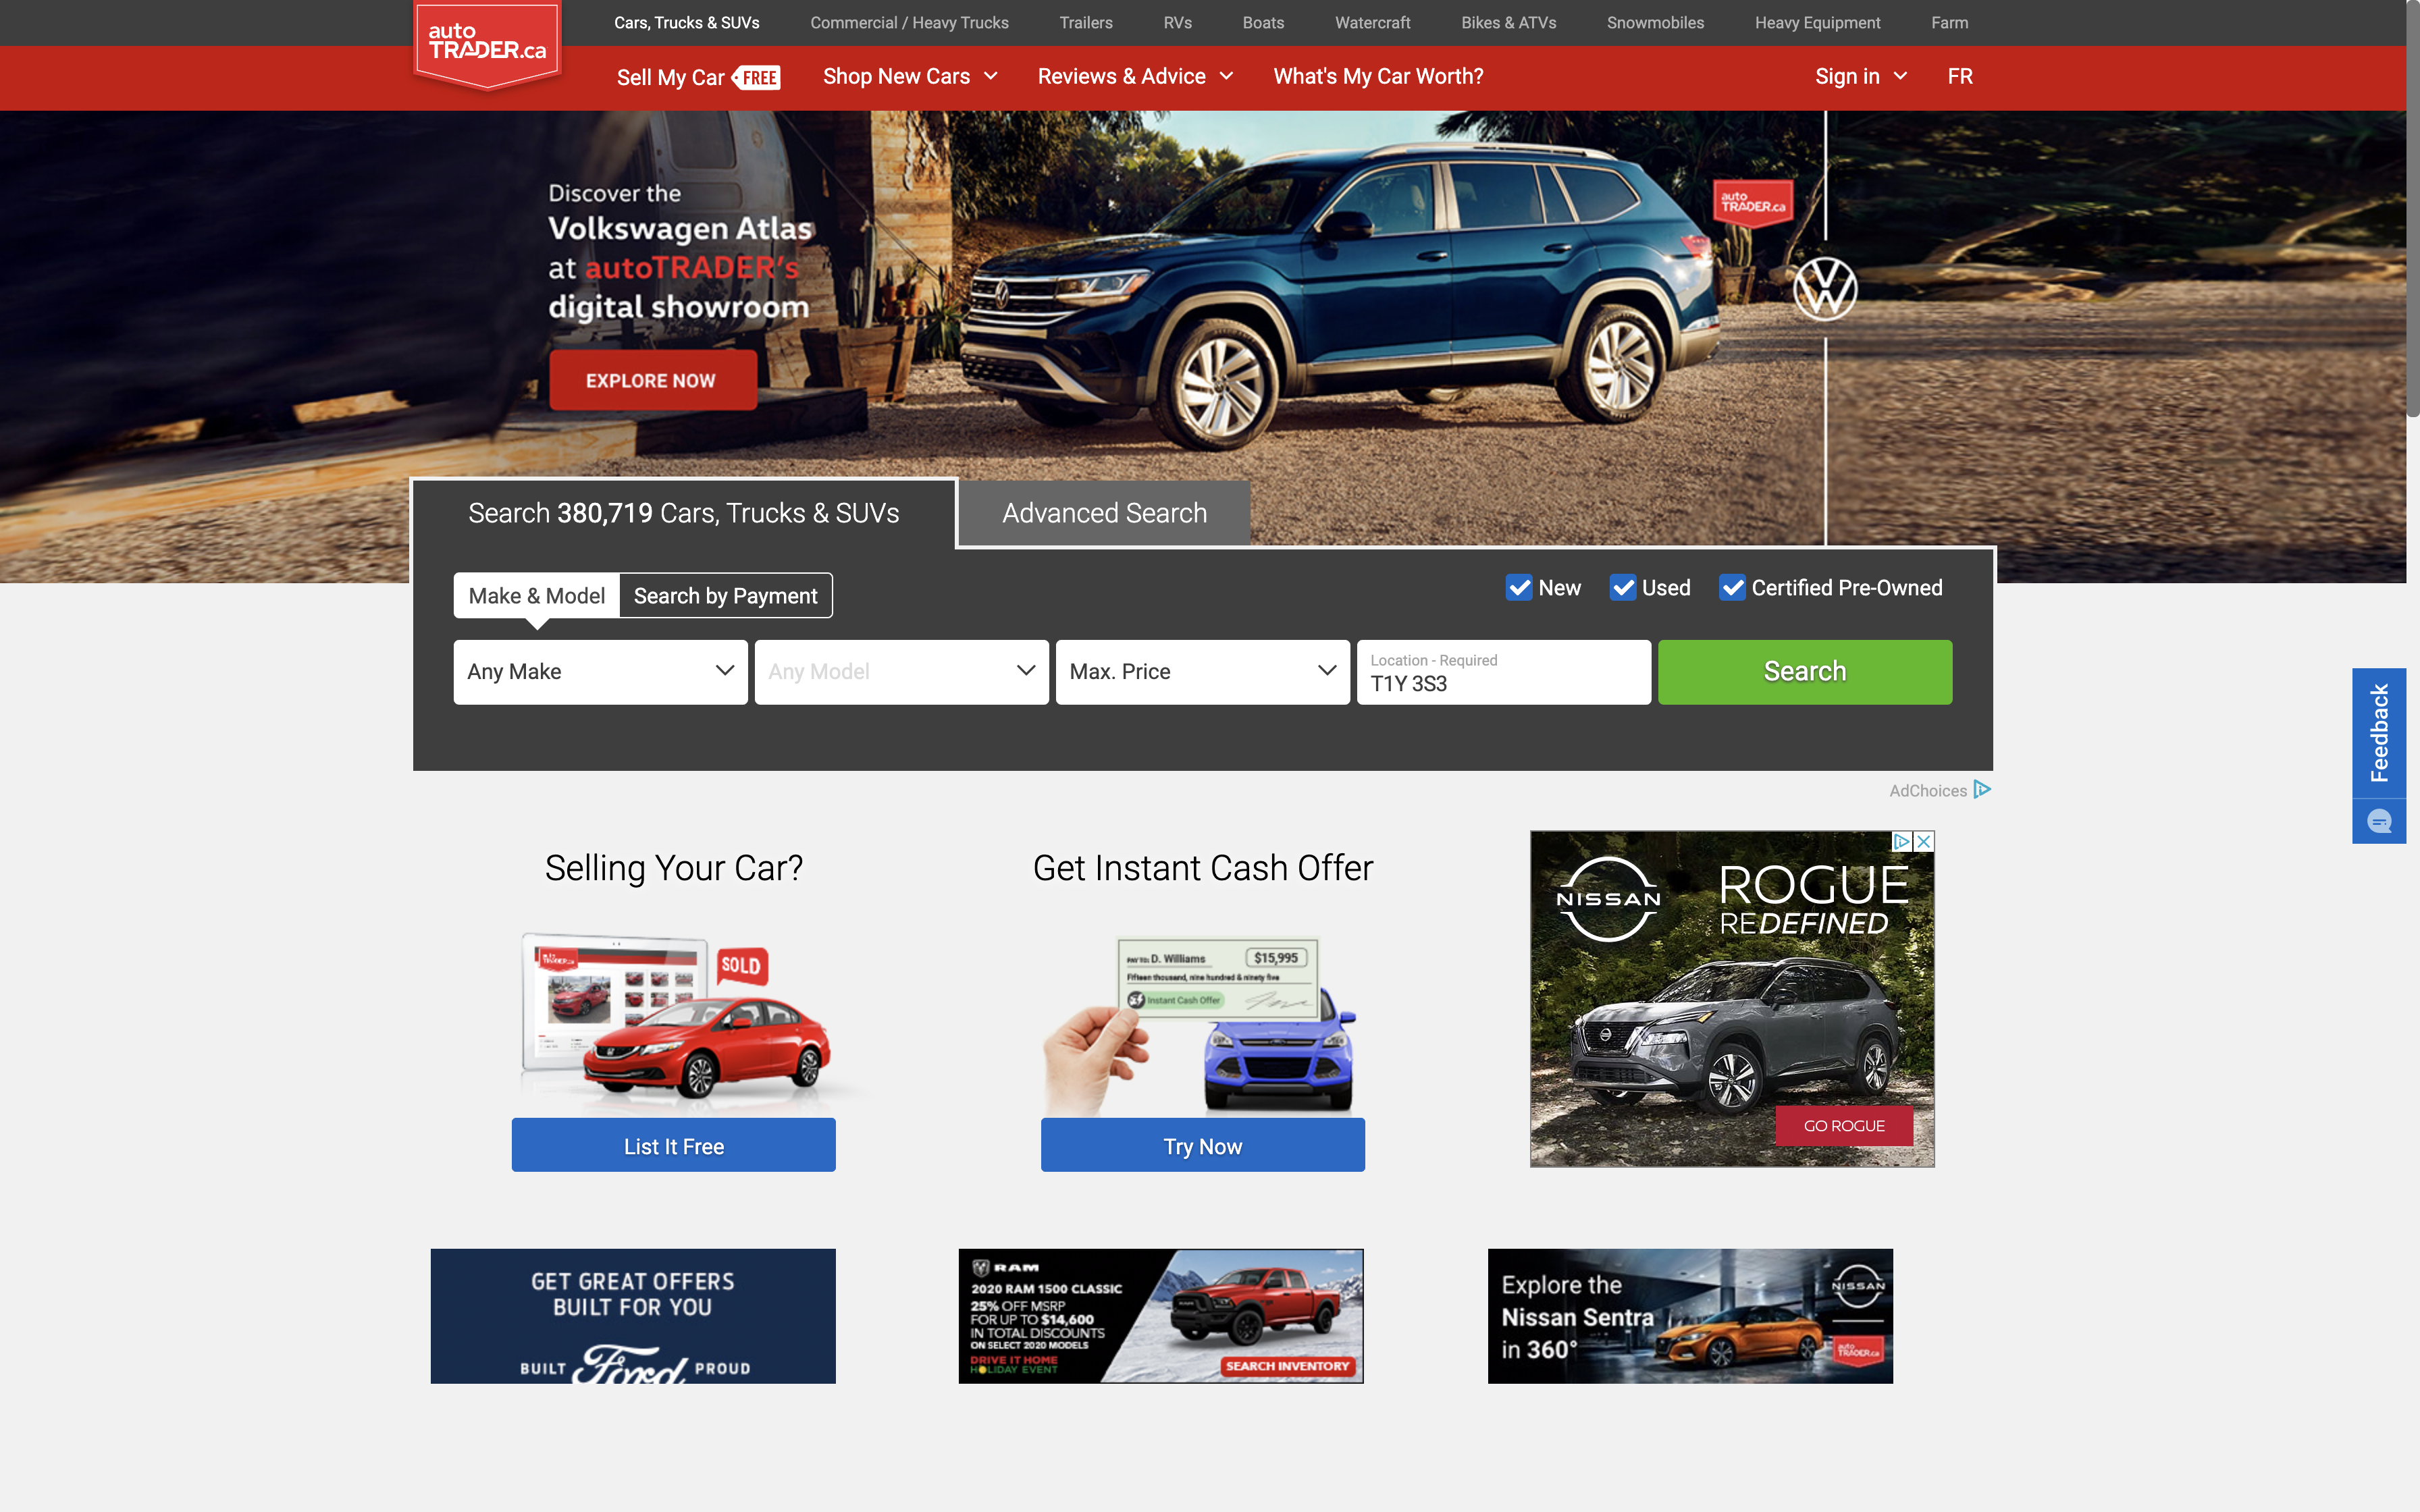
You can use this link if you want to follow along:
https://www.autotrader.ca/cars/honda/2020/on/toronto/?rcp=15&rcs=0&srt=3&prx=100&prv=Ontario&loc=toronto&hprc=True&wcp=True&sts=New-Used&inMarket=advancedSearch
2. Once ParseHub is open, click on “New Project” and use the URL from the Autotrader result page. The page will now be rendered inside the app.
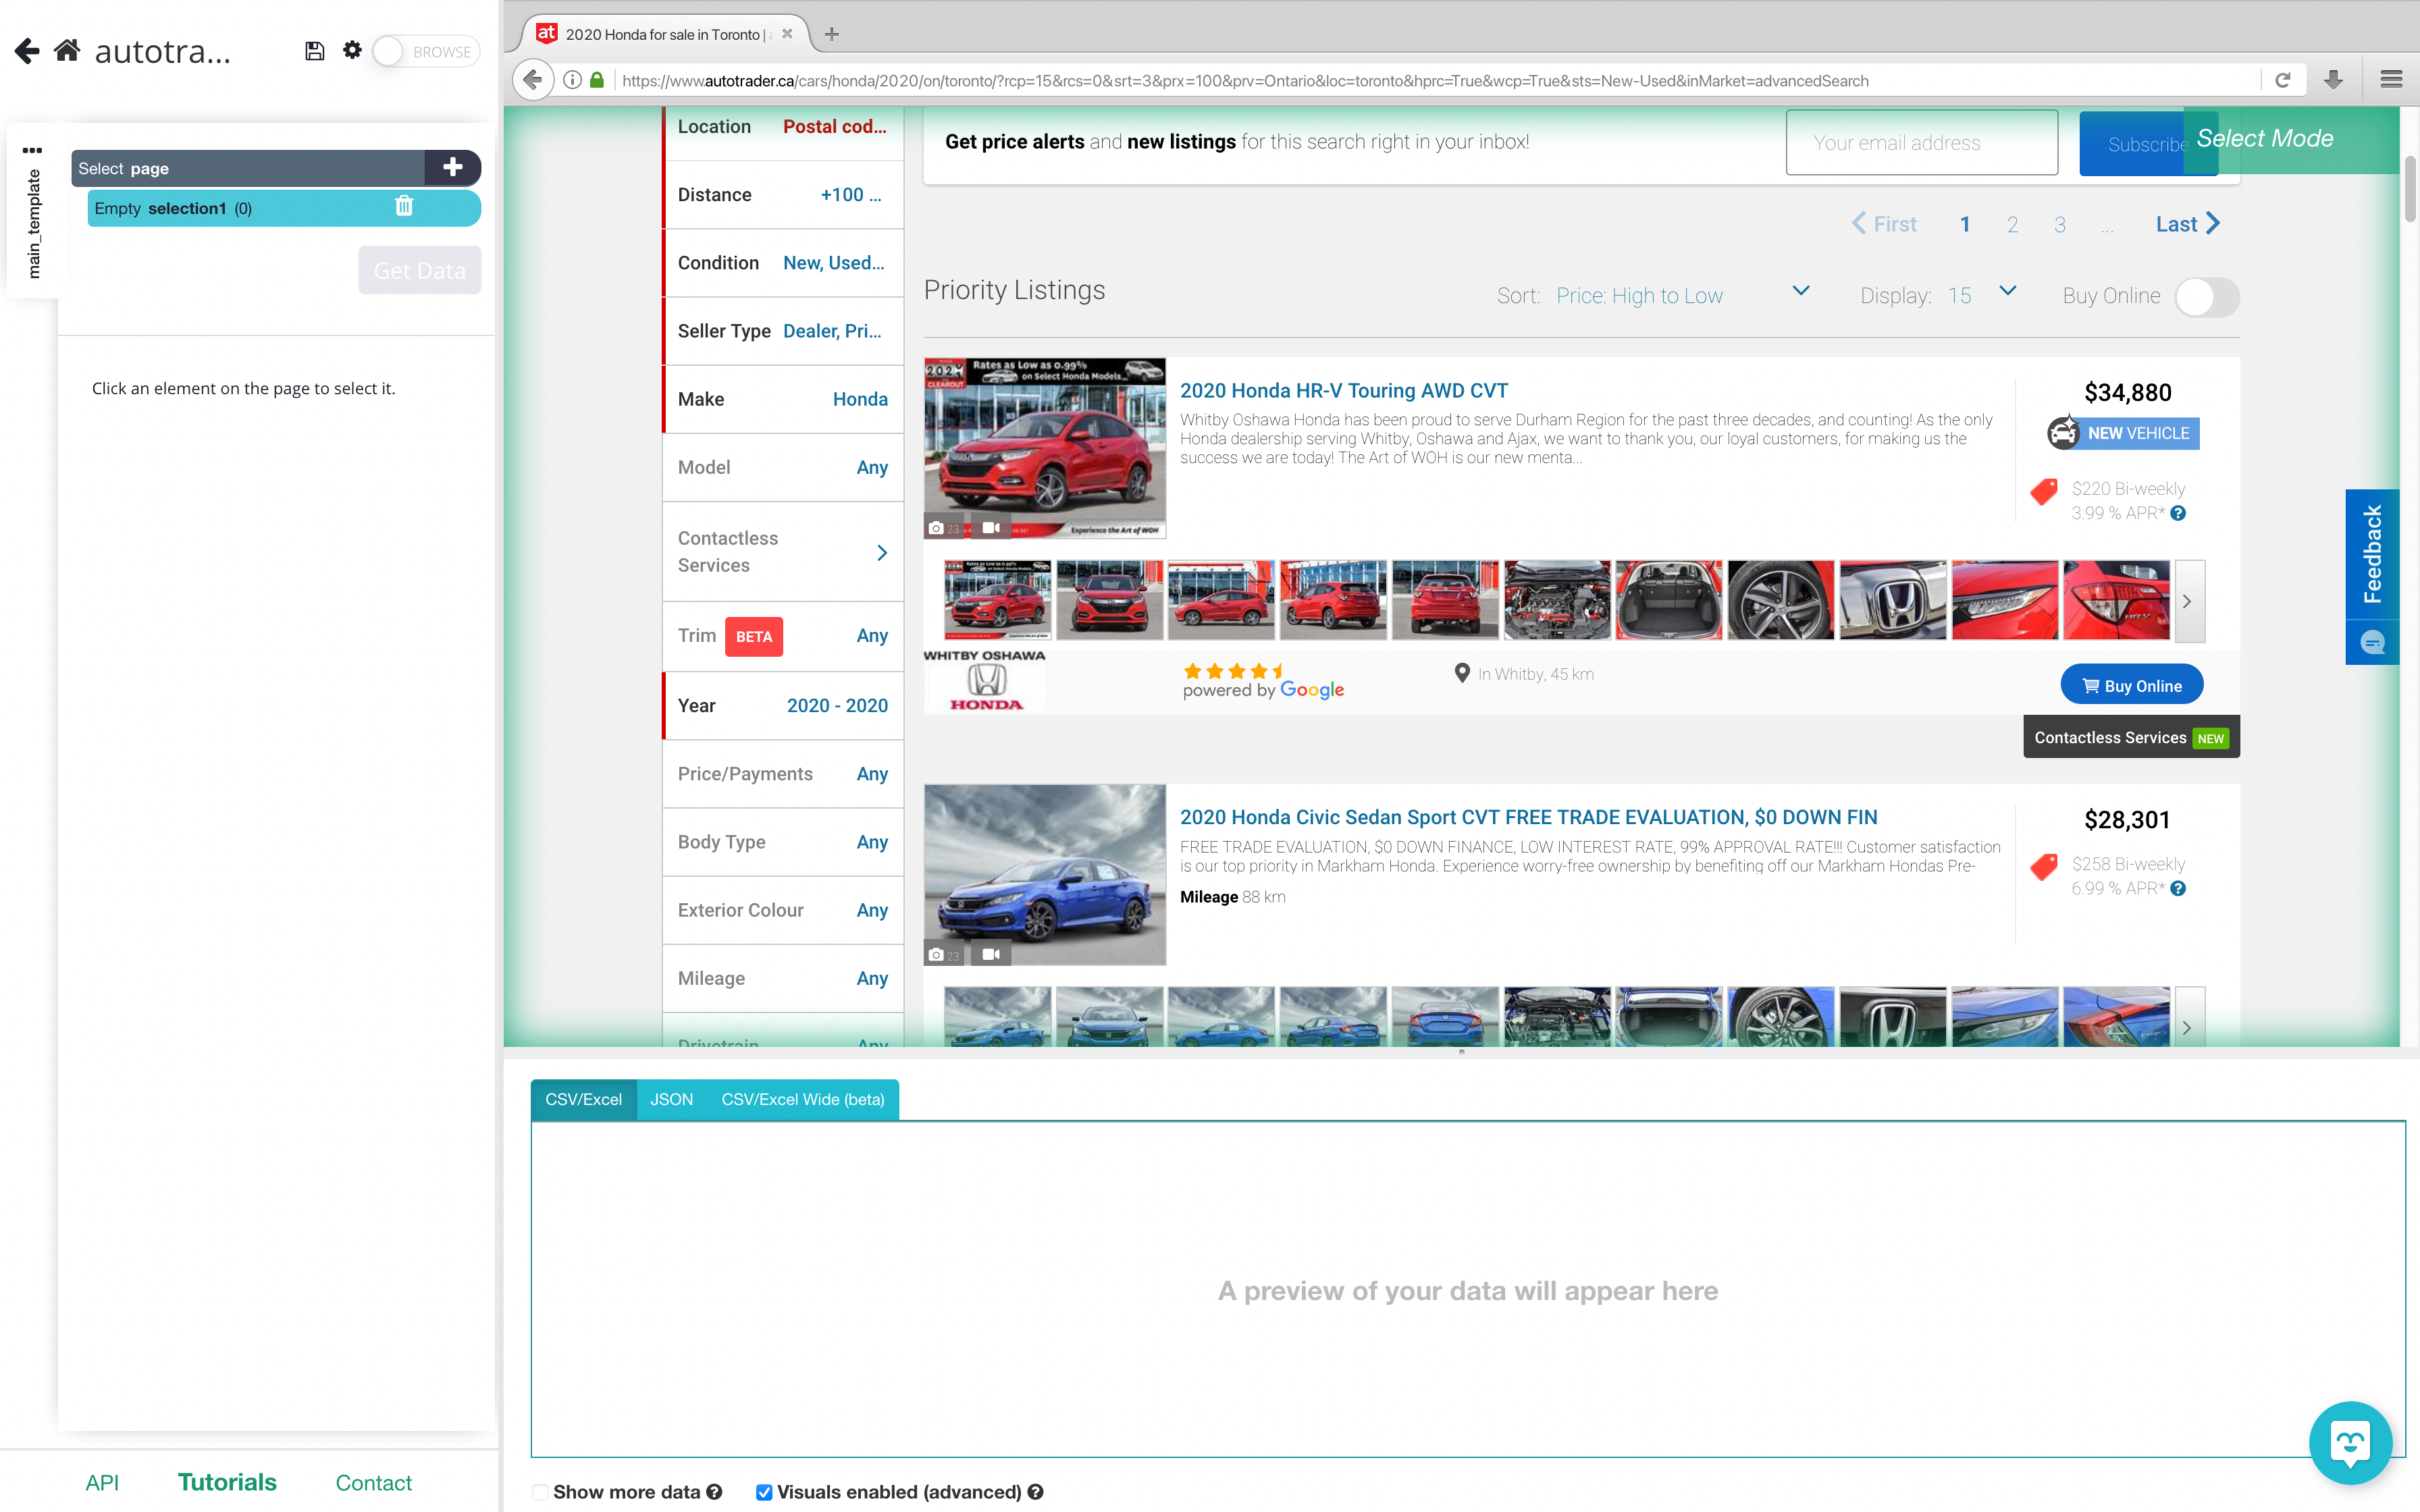
Scraping data behind pop-up windows
- When you first load the website inside of the app, You'll see an Autotrader pop up asking you to remember your search, you will need to tell ParseHub to click on this as it can mess up your project.
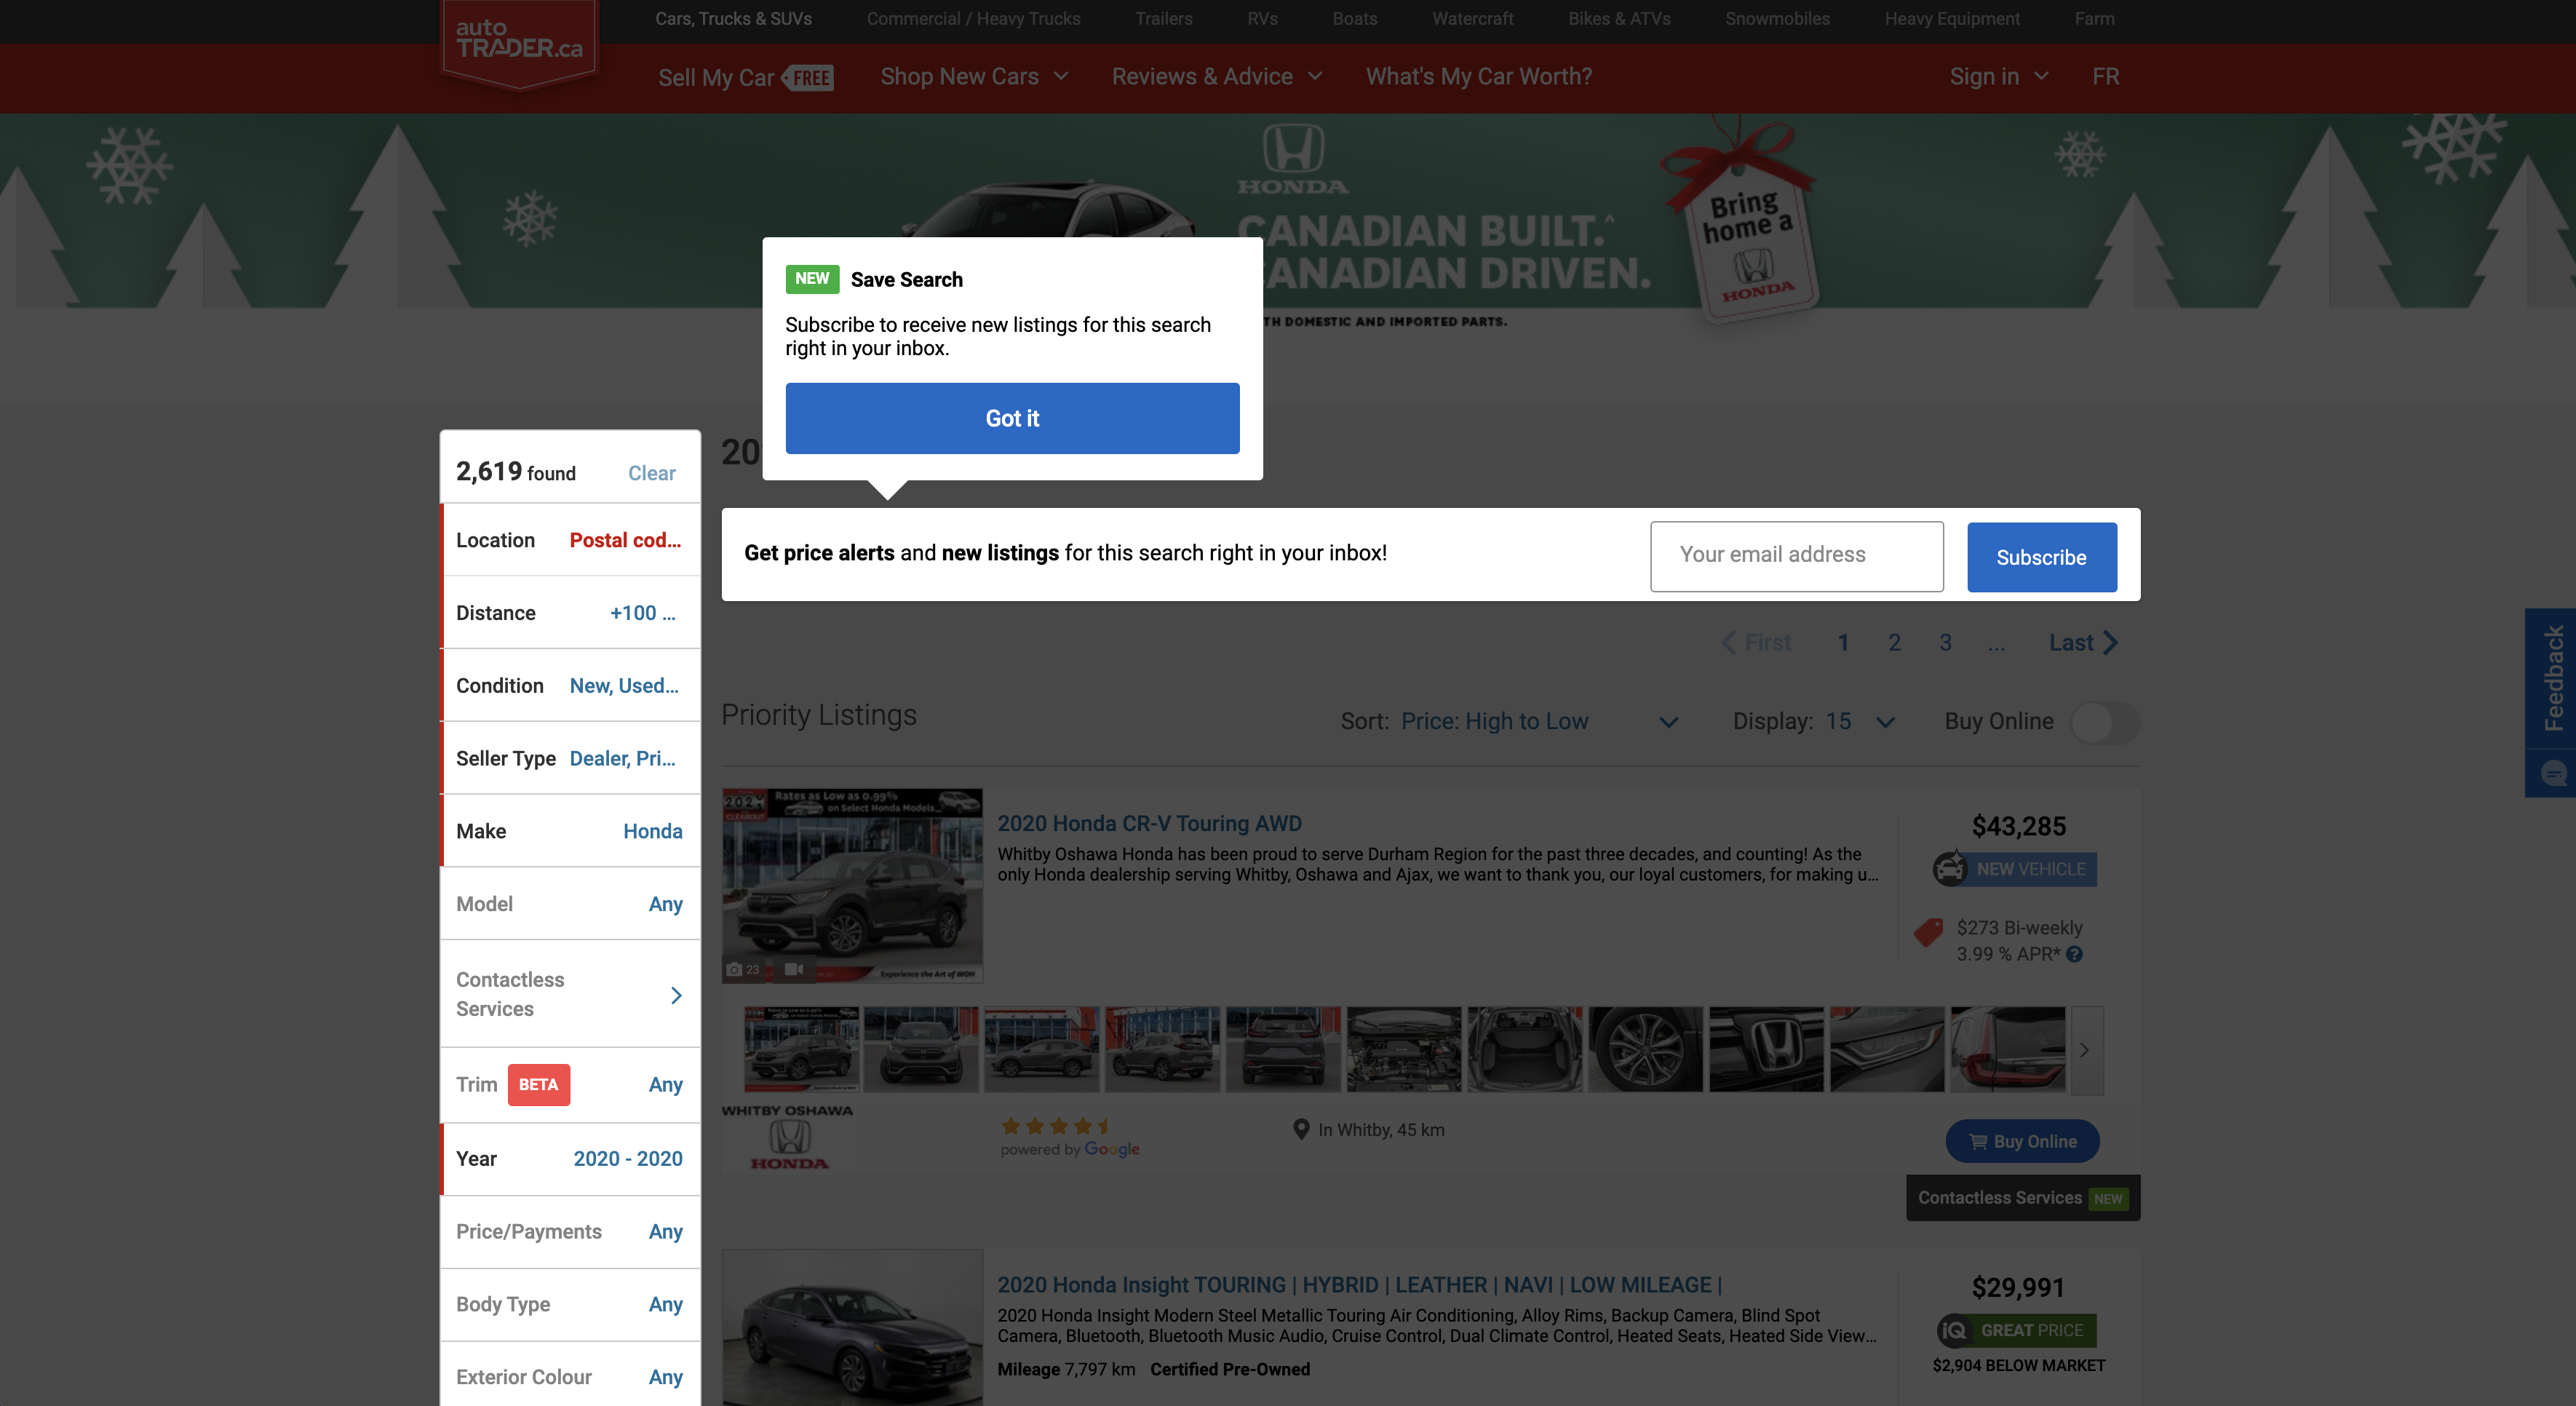
2. To do this, Using this Select command, click on the "got it" button on the pop-up to select it. You can rename this command to something more descriptive by clicking on the command itself. Let's name it "closePopup".
3. Click on the plus button next to "Select & Extract closePopup", and choose the Click command from the toolbox.
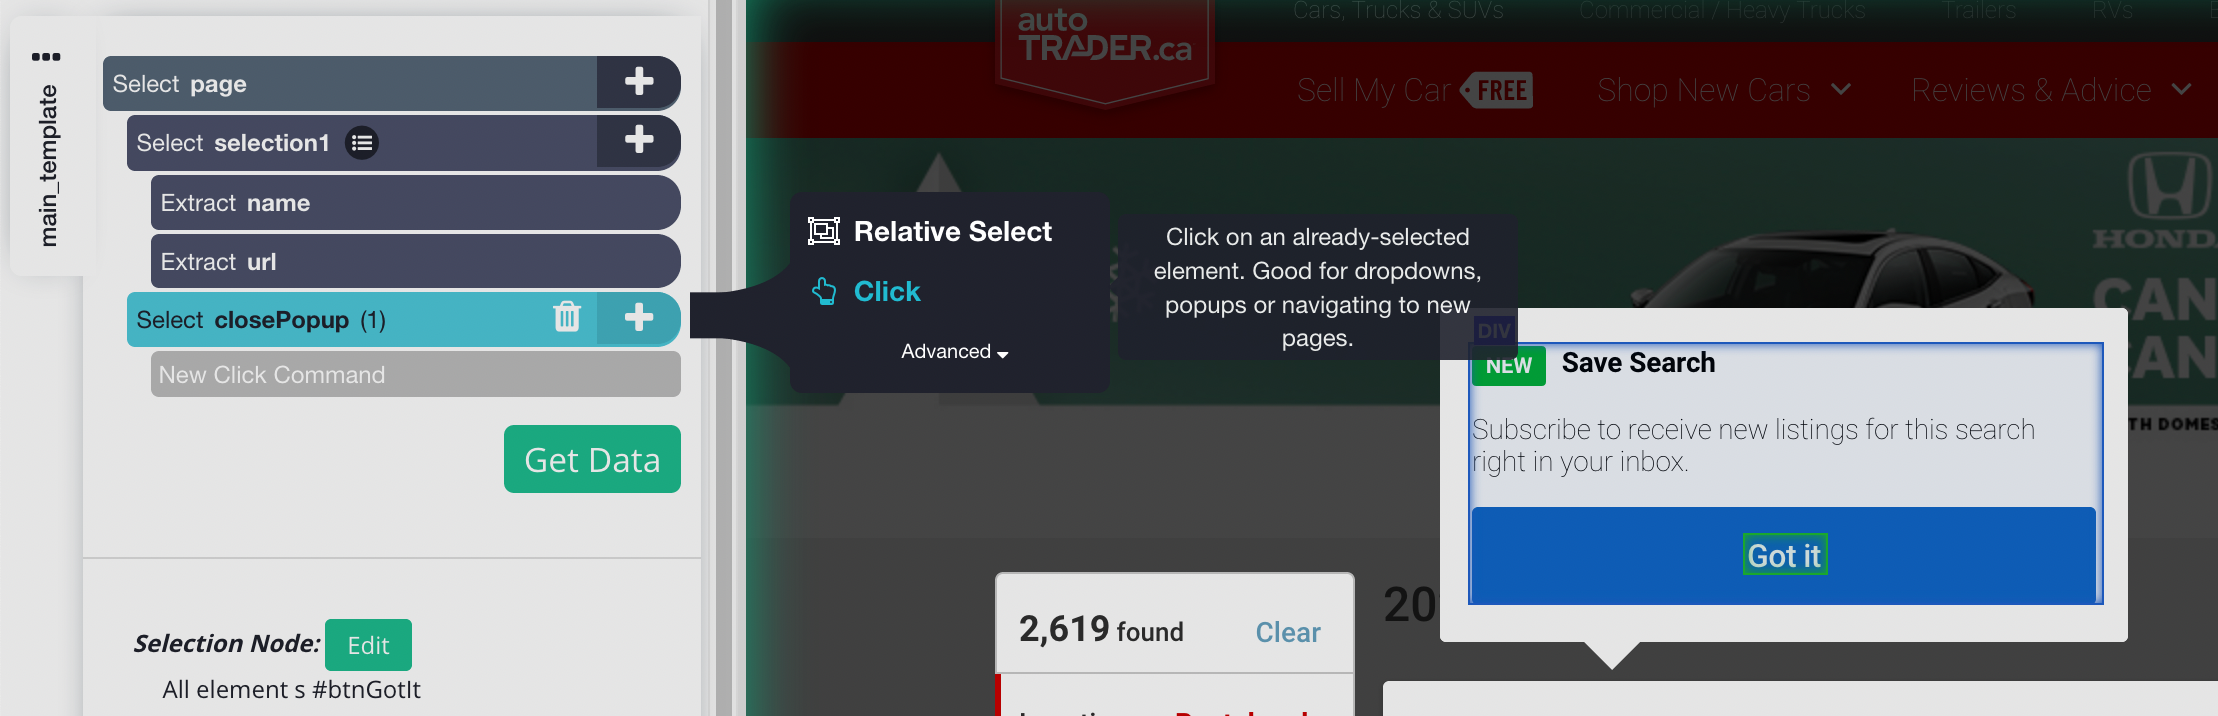
4. A pop up will appear and ask if this is a next button, click on no and select "continue executing the current template" option.
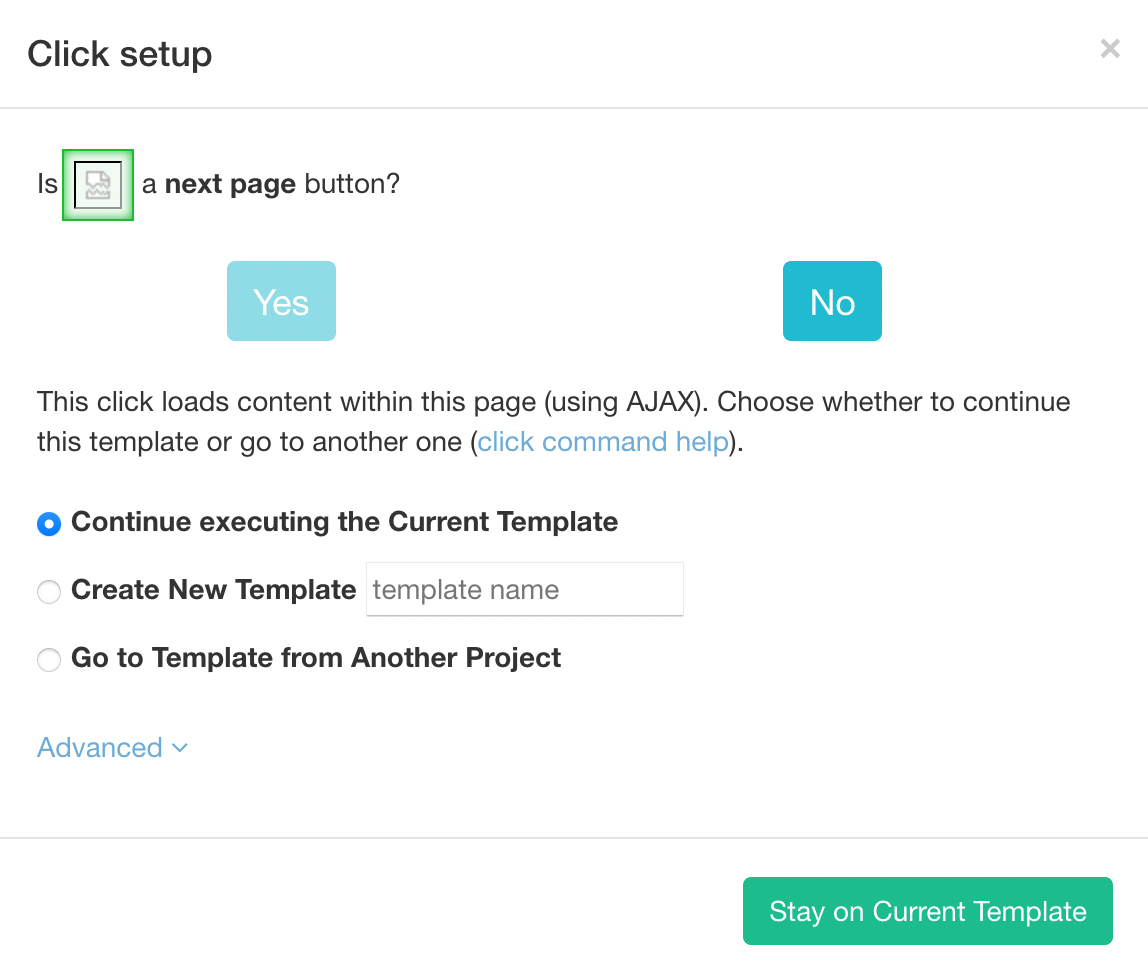
If you don't see this pop up right away, you can implement this step when you're testing your run. Simply stop the test when you see the pop up.
Now we can start scraping car data!
Scraping car data on the results page
- Click on the PLUS (+) sign next to page selection and choose the select command
- Start by clicking on the first name of the first model on the list. It will be highlighted in green to indicate it has been selected. On the left sidebar, rename your selection to “car_model”.
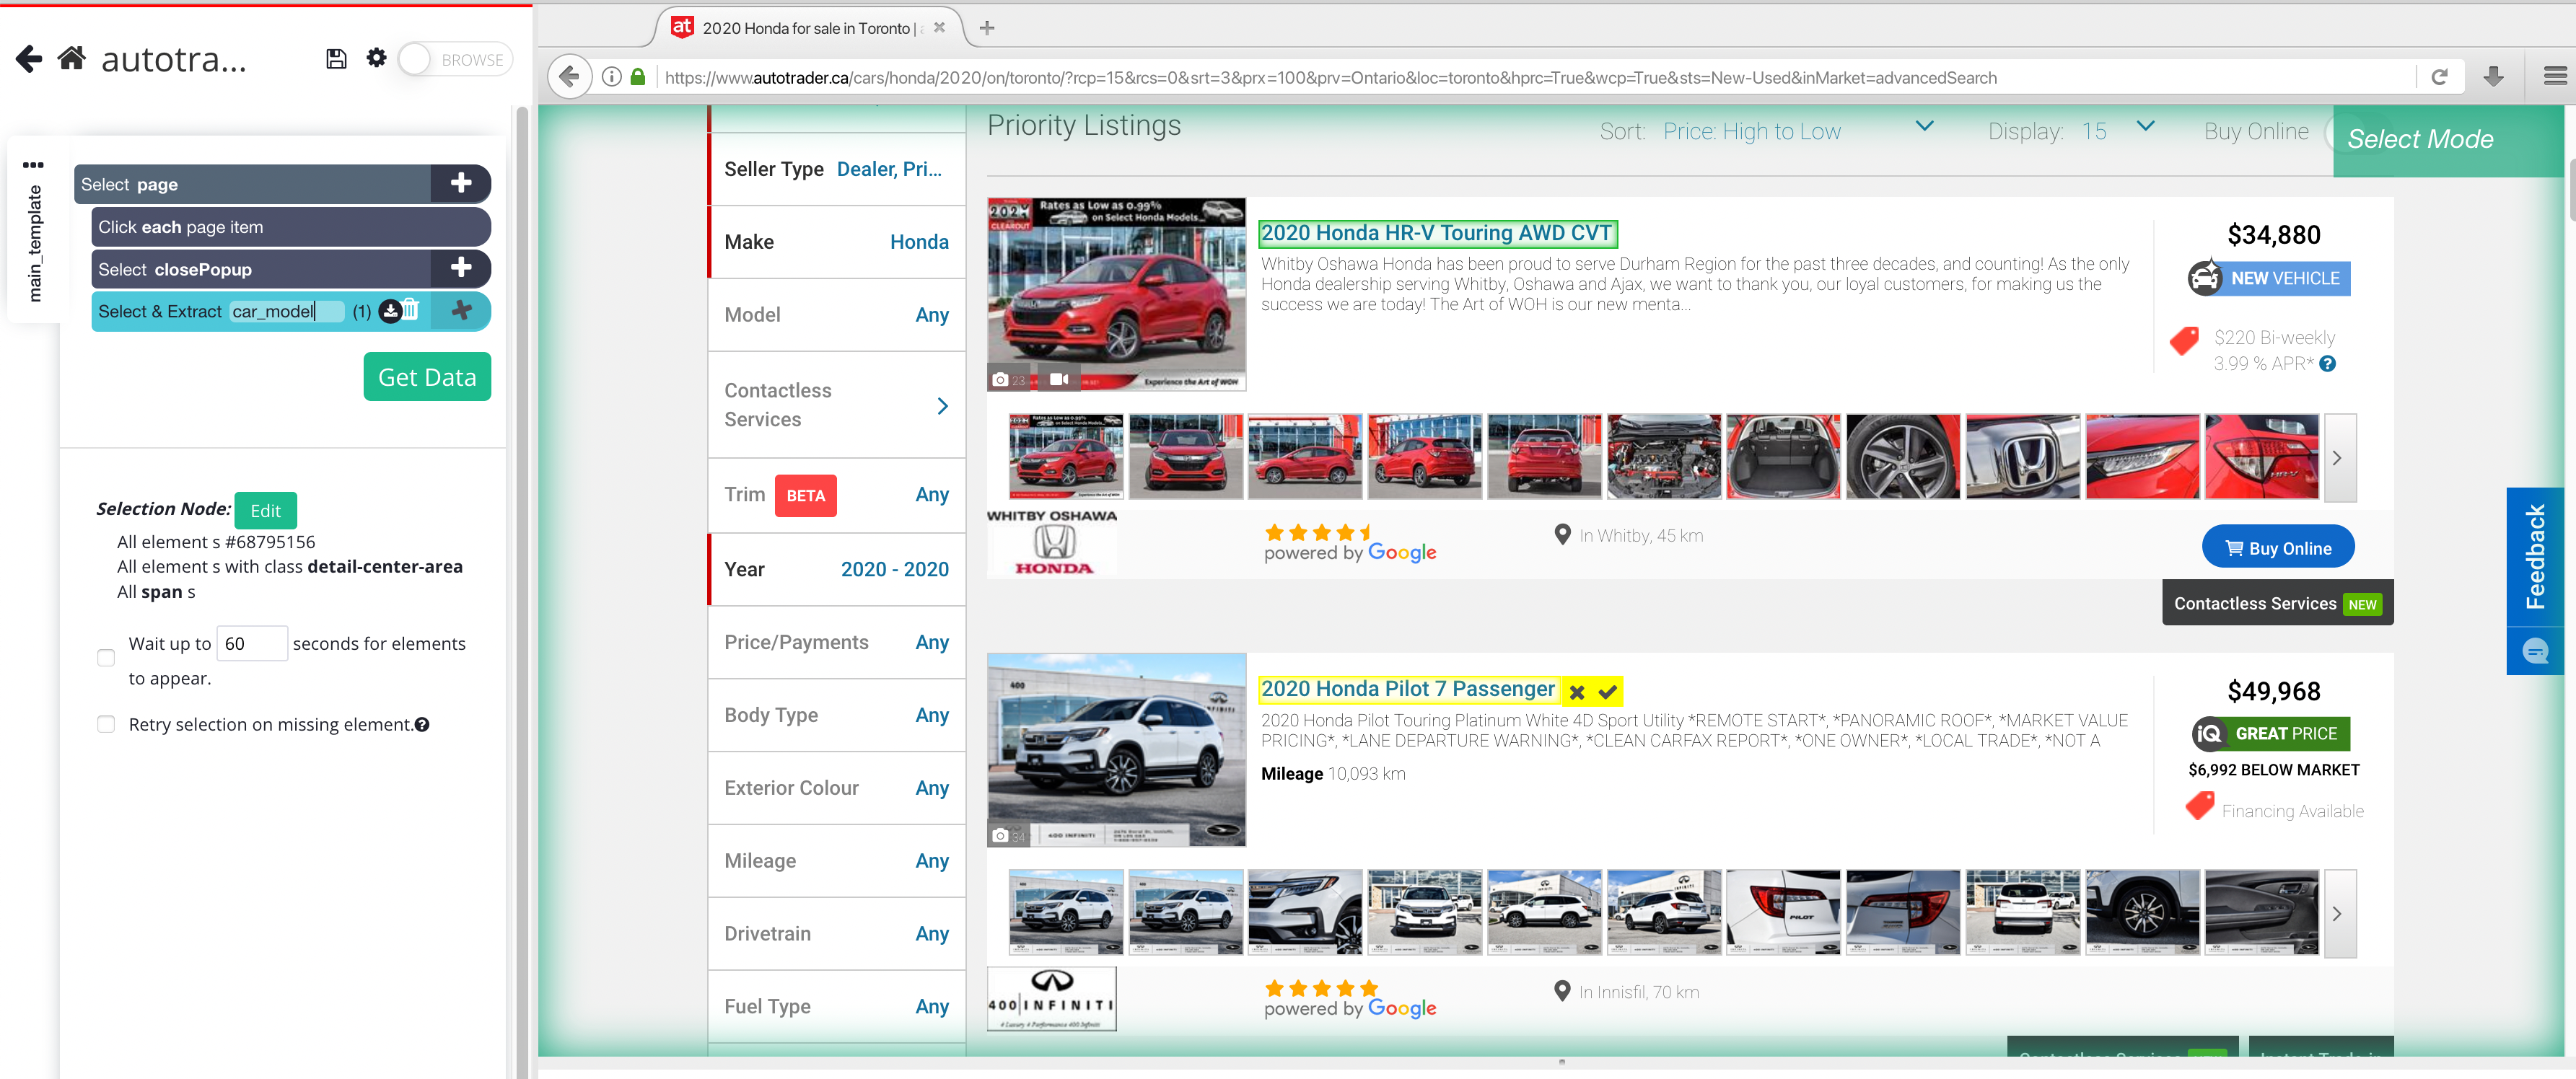
3. ParseHub will now suggest the other data you want to be extracted in yellow. Click on the second model on the list to select them all. All models on the first page will be highlighted in green now. You are now collecting the name and URL listing of the models.
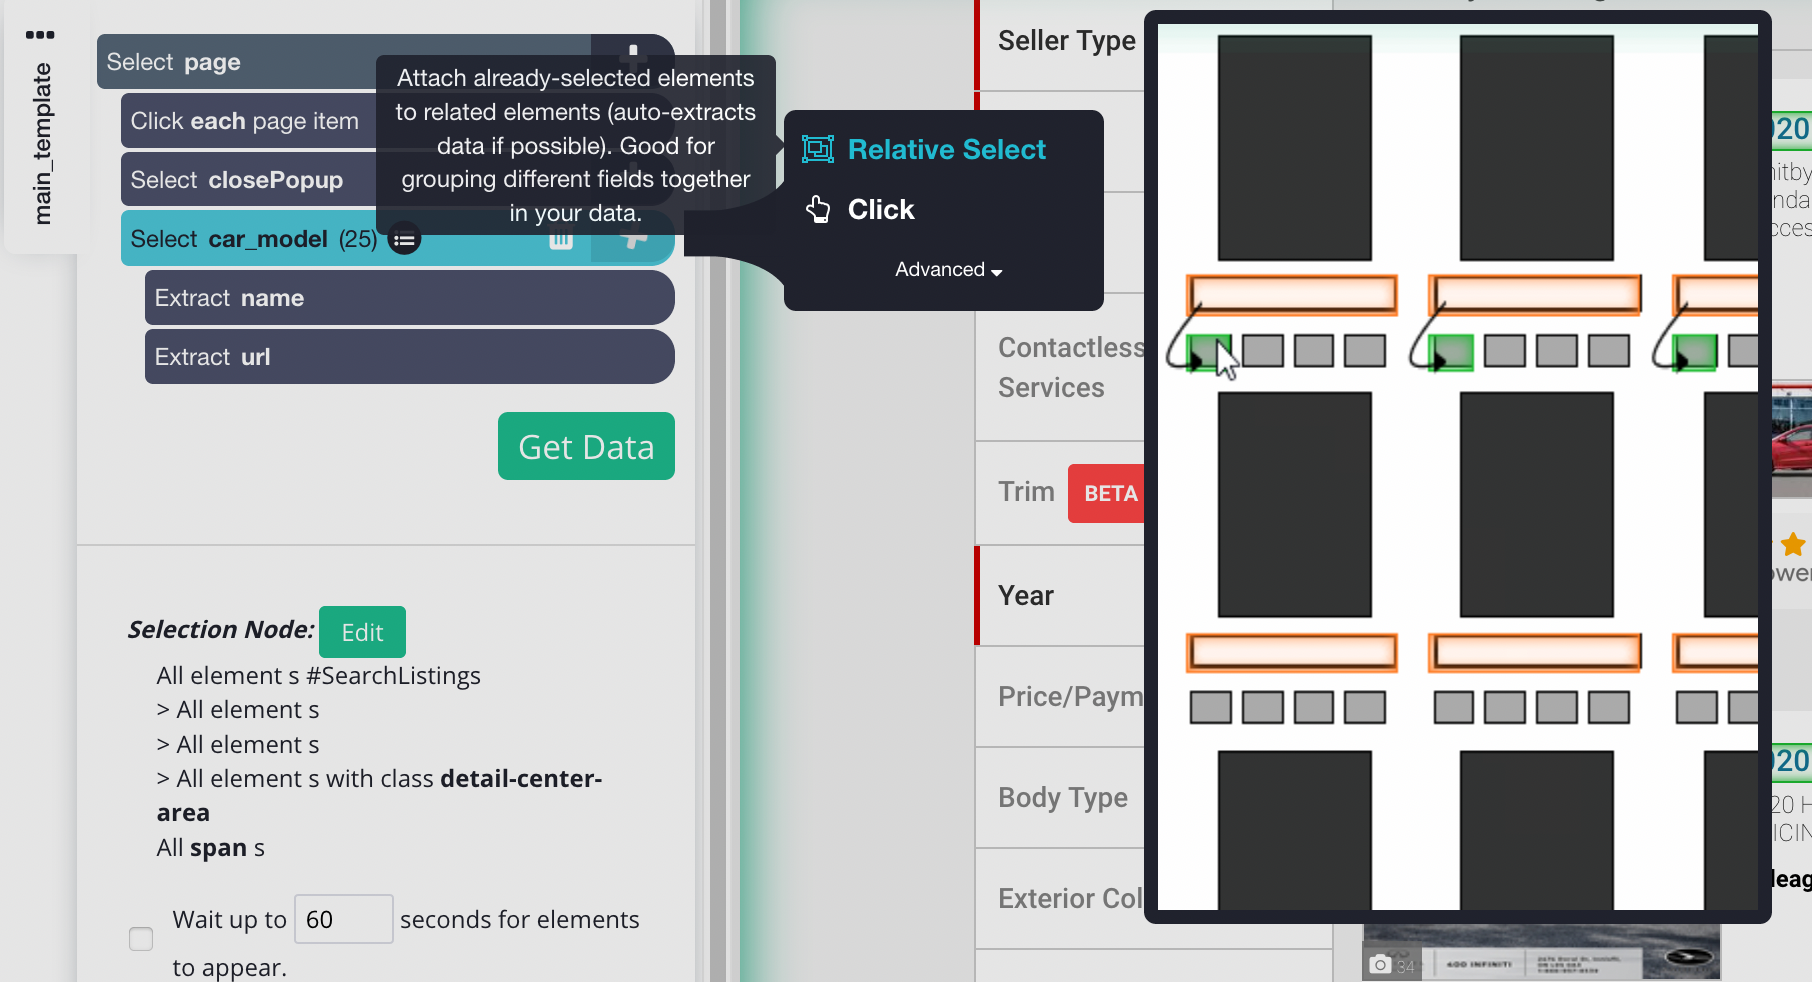
4. Now let’s extract data like price, location, image URL and price comparison to the market. To do this you will need to do a relative select command. Start by clicking on the PLUS(+) sign next to your car model selection and choose the Relative Select command.
5. Using the Relative Select command, click on the model of the first car that is highlighted in orange and then on its price. An arrow will appear to show the association you’re creating.
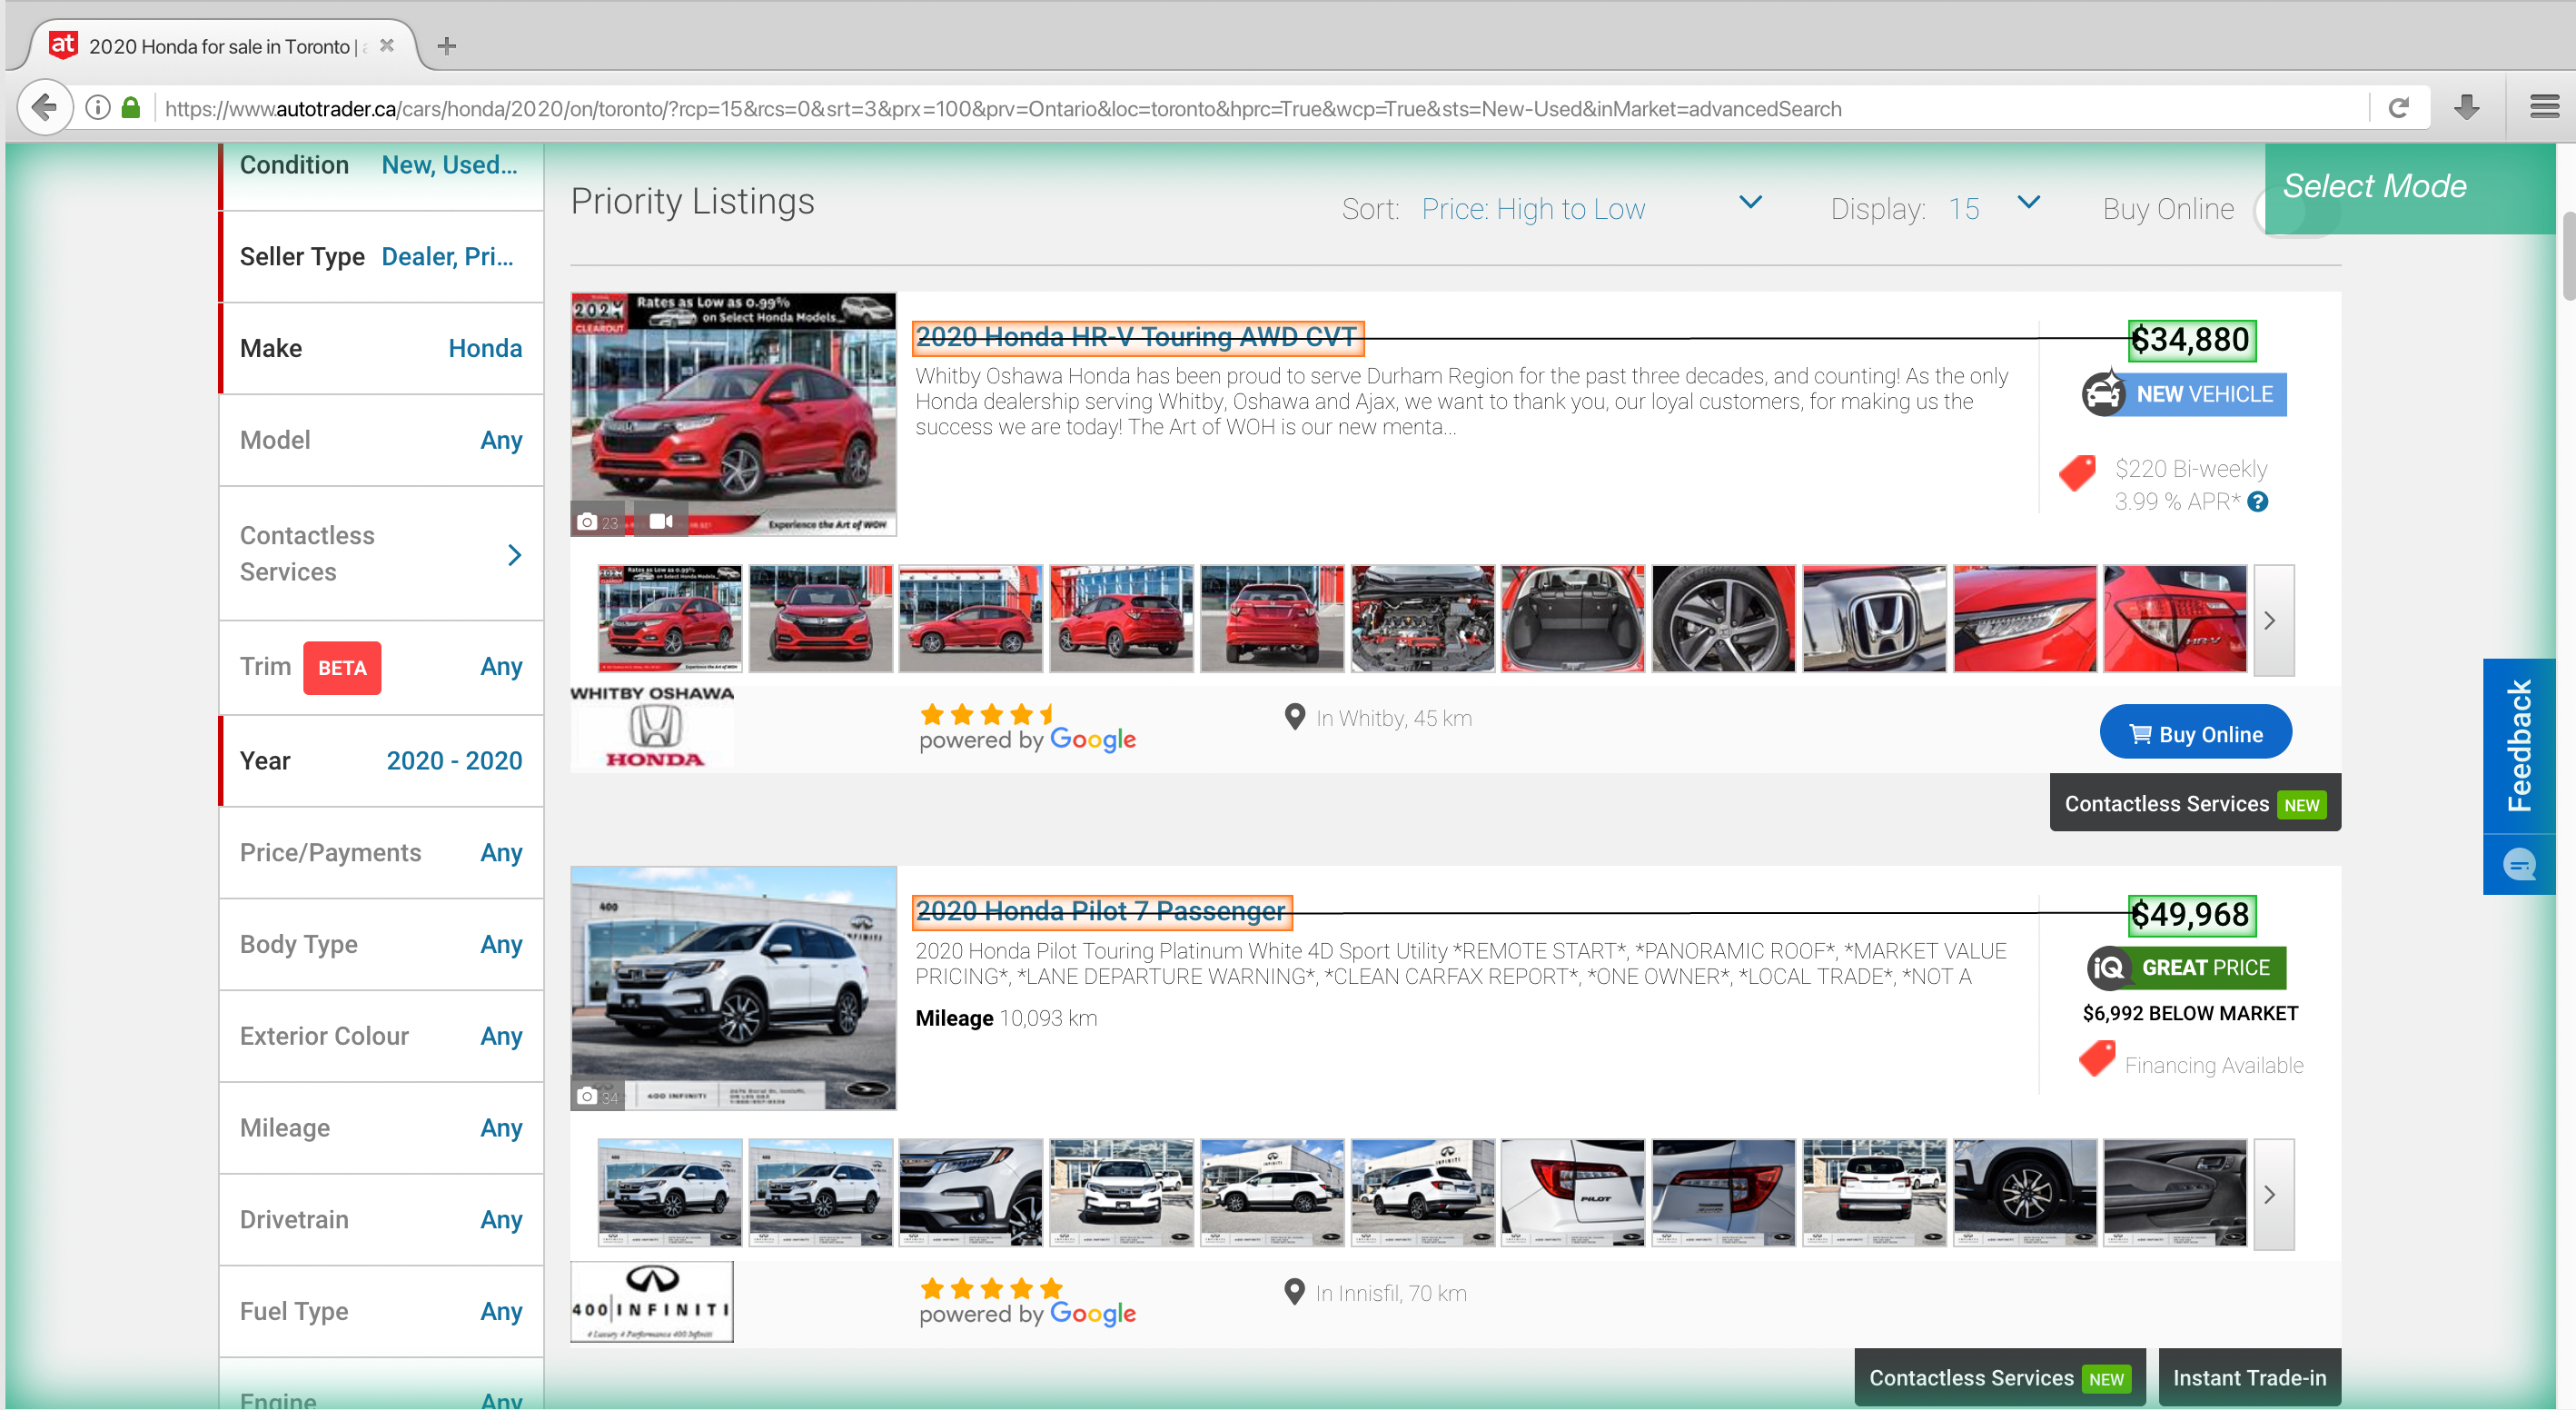
6. You might have to repeat this process for another car to fully train the web scraper. On the left sidebar, rename your selection to “price”.
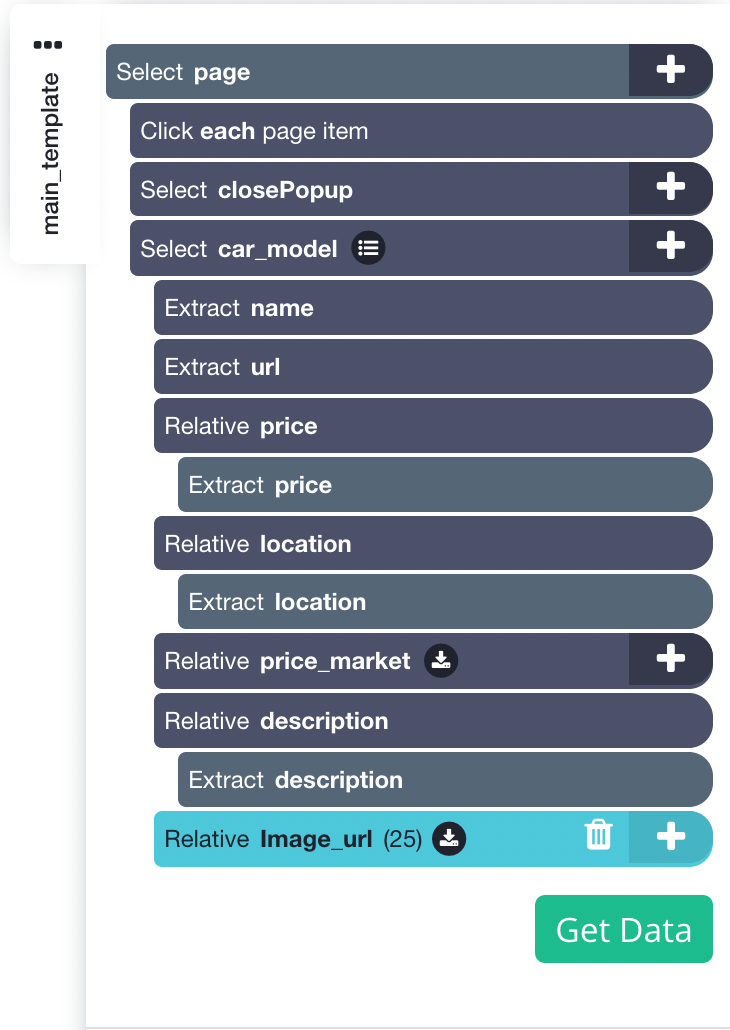
7. Repeat steps 4-6 to pull more data for each Car. In this case, we will also pull the image URL, location, description and price comparison to the market value (not all of the cars will have this selection). Your project should look somewhat like this:
Extracting more car data from each car listing
ParseHub is only extracting data from the results page like name and price, but let's extract features and specs of the vehicle and the dealership website if they have one.
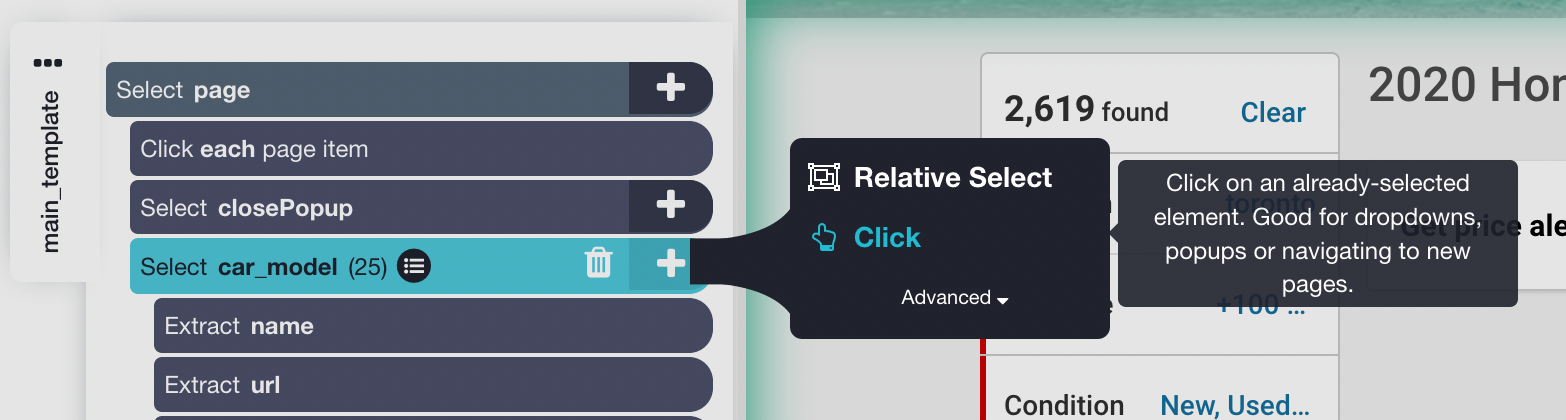
We will need to tell ParseHub to click on each listing and extract what data we want.
- Click on the PLUS(+) sign next to your “car_model” selection and choose the Click command.
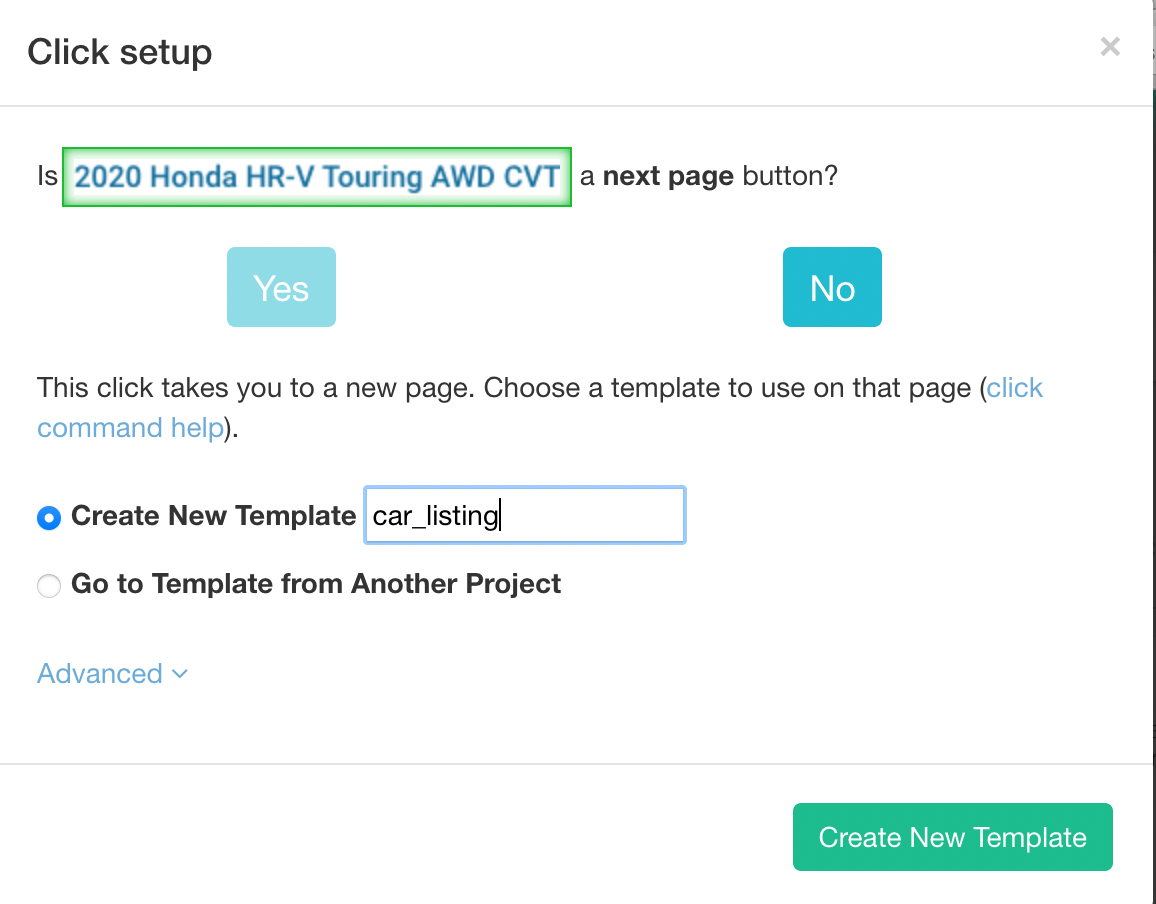
2. A pop-up will appear asking you if this is a “next page” link. Click on “no” and enter a name for this template. We will call it “car_listing”. You will now be taken to the model of the first listing on the page.
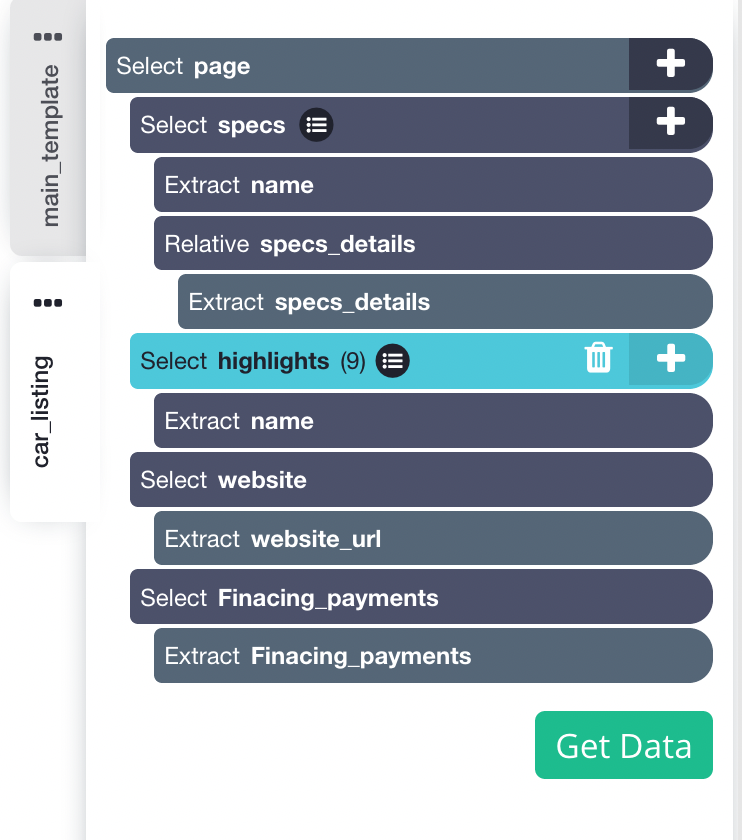
3. The car page will render in a new browser tab and you will be able to make your first selection of data to extract. In this case, we will select the highlights and specs of the car and the dealership website.
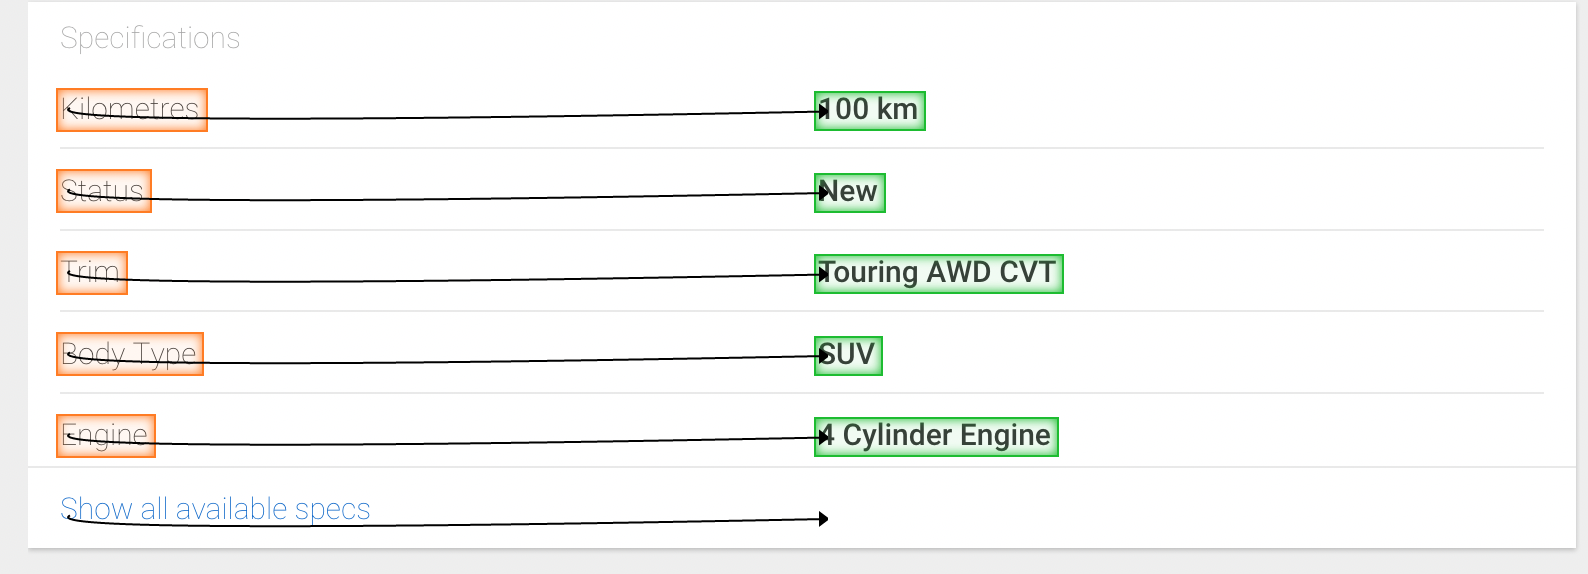
4. Click on the PLUS(+) sign next to the “page” selection, choose the Select command and you will be able to create new select commands and click on more data to extract. Scroll down until you see “specifications” and click one of the Specifications label like the kilometres of the car. ParseHub will then suggest what else you want to extract. You can now click on another specifications label to extract all of them. Rename your selection to specs
5. Now make a relative select command and extract data the specs details
6. Repeat the previous step to extract financing payments, highlights and the dealership website. Your car_listing template should look like this:
Adding pagination
Now ParseHub is extracting the results page and data from each listing on the first page. But let's extract data from multiple pages.
NOTE: Before you start dealing with pagination, you will need to contact customer support to make your profile and admin user. This will allow you to check off "ignore disable elements" box which we will go over in a few steps
Autotrader doesn't have a next button, but ParseHub can still add pagination. We just have to do some select and relative select commands
- Return to your main_template using the left-side tabs. Use the browser tabs to go back to the search results page.
- Click on the PLUS(+) sign next to your “page” selection and choose the Select command. Scroll to the bottom of the page and click on the 1st page. Rename your selection to “current_page”.

3. Click on the PLUS(+) next to your current_page selection and click on the relative select command. Now click on the current page (1) then click on the second page (2) to make the relation. Let's rename this relative select command to "next_page"

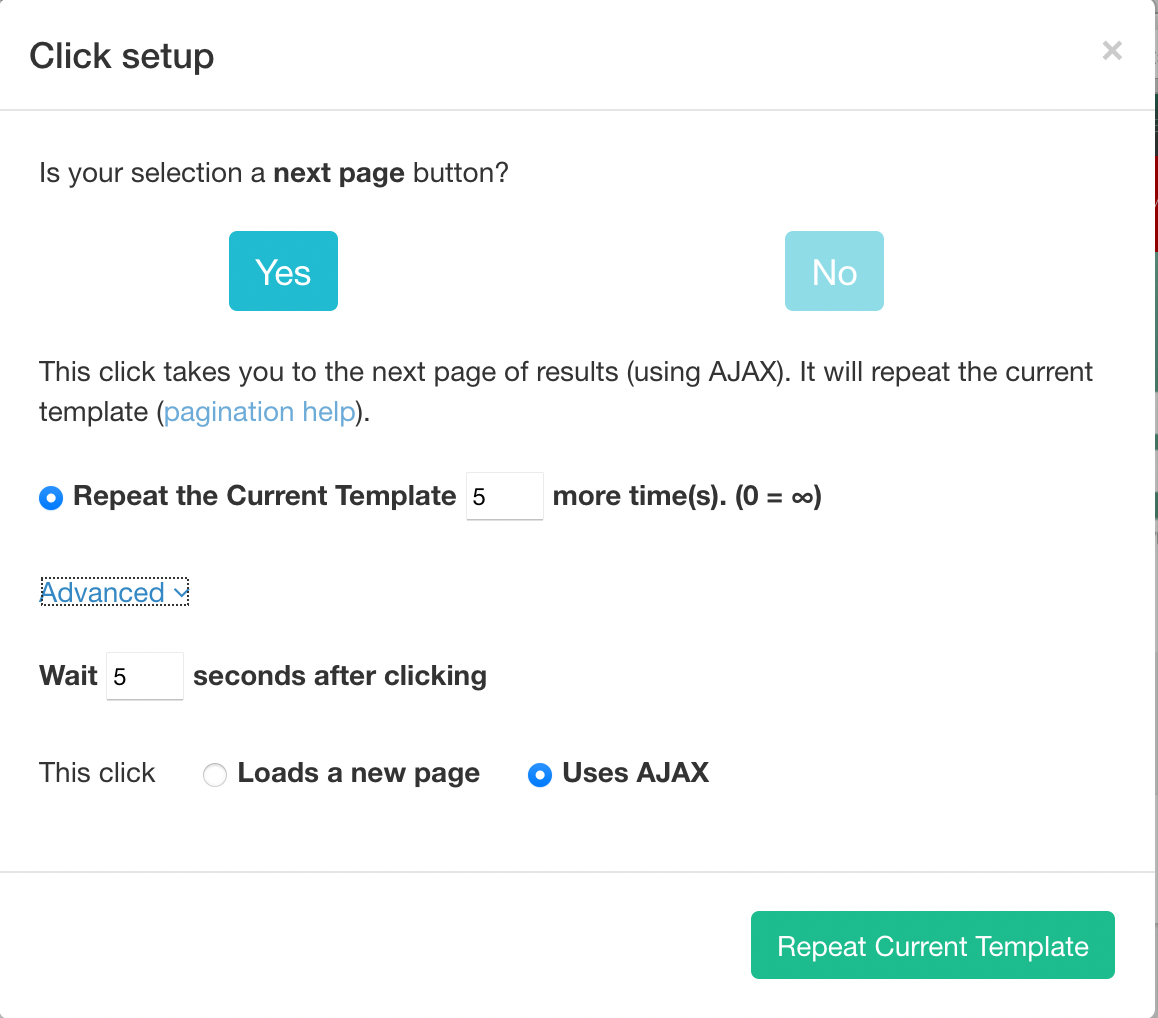
4. Click on the PLUS(+) sign next to your “next_page” selection and choose the Click command.
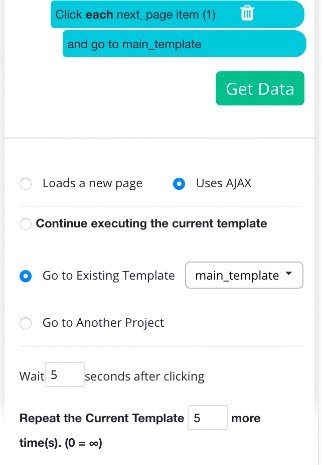
5. A pop-up will appear asking you if this is a “next page” link. Click on “Yes” and enter the number of additional pages you would like to scrape. In this case, we will scrape 5 more pages for this project. Be sure to select "uses AJAX"
6. You'll automatically be taken to the next page, to ensure its working properly, scroll down to your next selection and make sure the current and next page are selected. If not, simply make the adjustments so that the current_page selection is page 2, and the relative select command is page 3. ParseHub should now understand what you're trying to achieve.

7. To make sure pagination is working correctly, click on browse button at the top and enter browse mode. Now click on page 3. Turn browse mode off and check your current_page and next_page selection, pages 3 and 4 should now be selected.

8. This particular website has their pagination buttons tagged as "disabled", therefore ParseHub by default skips clicking on them. To resolve this issue, please contact our support team (from chat or email at support@parsehub.com), and they will change this Admin option for you.
If you still need more help, you can contact customer support or watch this video for more information.
If you don't want to complete this step, you can easily change the display option to the number of vehicles you want to scrape.
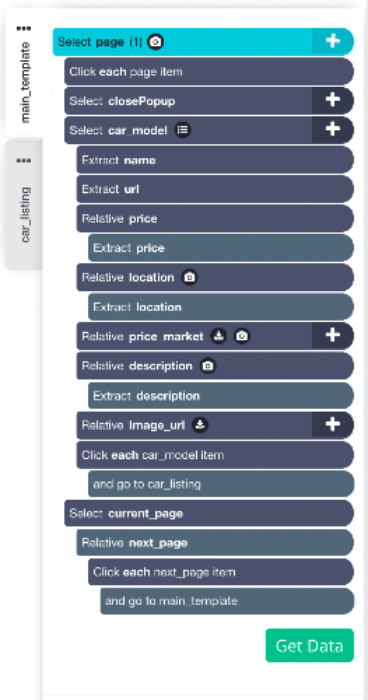
Your final project should look like this:
Running Your data extraction project
Now it's time for the fun part, running your data extraction project! Simply click on the green “Get Data” button.
On this screen, you’ll be able to test, run or schedule your project. If you want to constantly get the latest data extracted on a daily or weekly basis, the schedule option allows you to.
For bigger projects, we recommend testing it to make sure it's extracting data properly.
In this case, we will just run it right away.
Closing thoughts
Whether you’re a consumer or a car dealership, you can use our free data extraction tool to scrape websites like Autotrader to help you make the right decision. Whether that’s to find the best price to sell the vehicle or to find the best vehicle within your price and needs.
What will you scrape?
Happy scrapping!
You may also enjoy some of our other blog posts: