
Web Scraping has tons of uses.
And in the past, we’ve talked about how you can use web scraping to boost your marketing strategy.
One way you can do this is by scraping meta titles and descriptions from other websites that write on topics similar to yours.
You can then use these meta titles and descriptions as part of your keyword research or inspiration for new content ideas.
Today, we will go over how to use a web scraper to extract meta titles and descriptions from any website. We will then export these titles and descriptions into a convenient CSV or JSON file.
A Free and Powerful Web Scraper
To complete this project, we will use ParseHub, a free and powerful web scraper that can work with any website.
Make sure to download ParseHub for free before we get started.
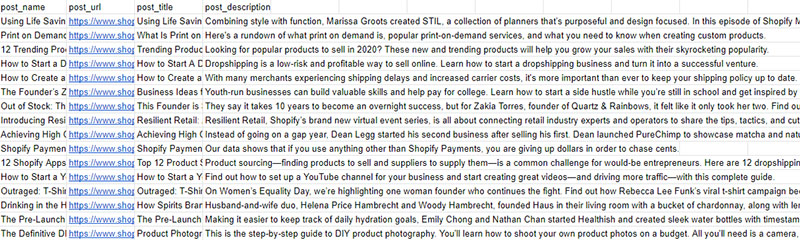
Also, for this project, we will scrape data from Shopify’s Ecommerce Marketing blog. We will extract the Meta Title and Meta Description of each post on the page.
Setting Up Your Project
Now it’s time to get started.
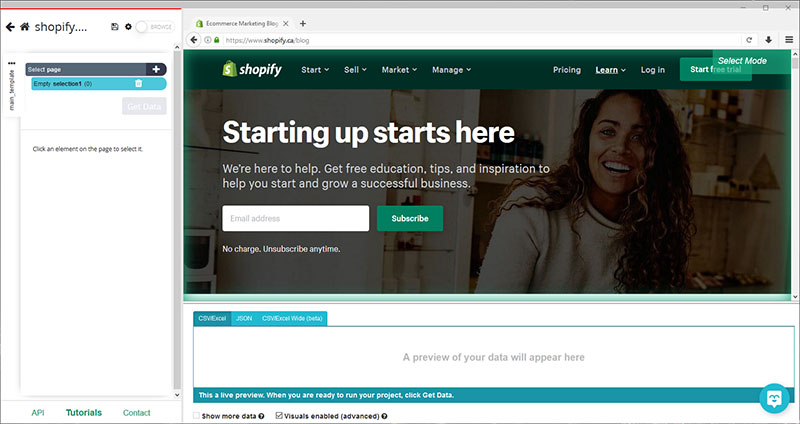
- Download and open ParseHub. Click on “New Project” and enter the URL you will be scraping. In this case, we are scraping Shopify’s Eccomerce Marketing blog from the meta titles and descriptions of each blog post. Once submitted, the page will render inside the app.
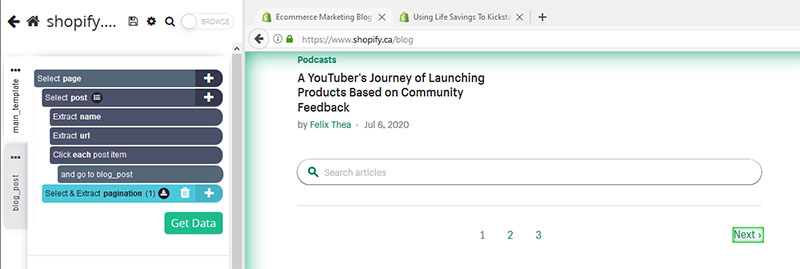
- A “Select” command will be created by default, start by selecting the first blog post on the page by clicking on its headline. It will be highlighted in green to indicate that it’s been selected. The rest of the posts on the page will be highlighted in yellow.
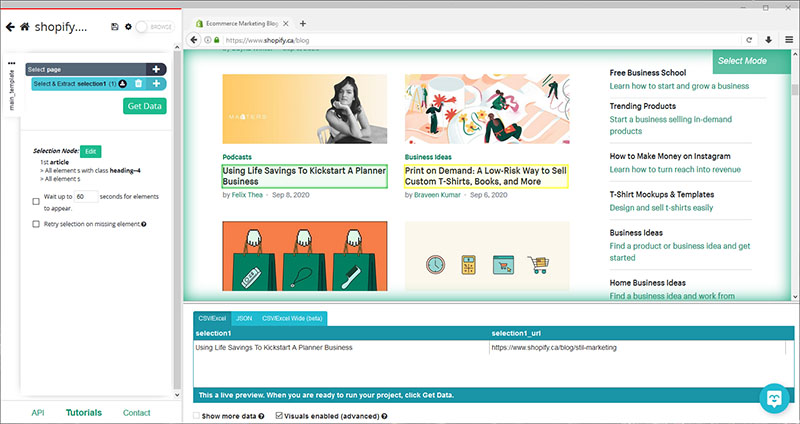
- Now, click on the second post on the list to select all the posts. They will all now be highlighted in green. On the left sidebar, rename your selection to “post”.
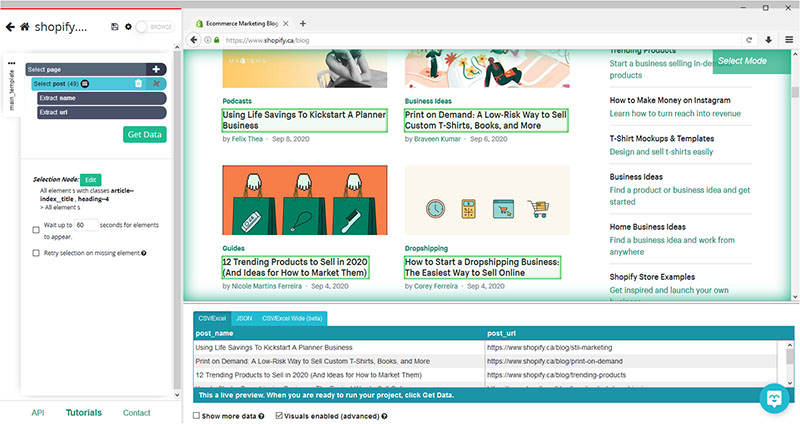
- ParseHub is now pulling the headline and URL for each post on the page. Let’s now tell ParseHub to click on each post to also extract the Meta Title and Meta Description of each post. (Note: Remember, when it comes to SEO optimized content, the headline and meta title of each post are usually different).
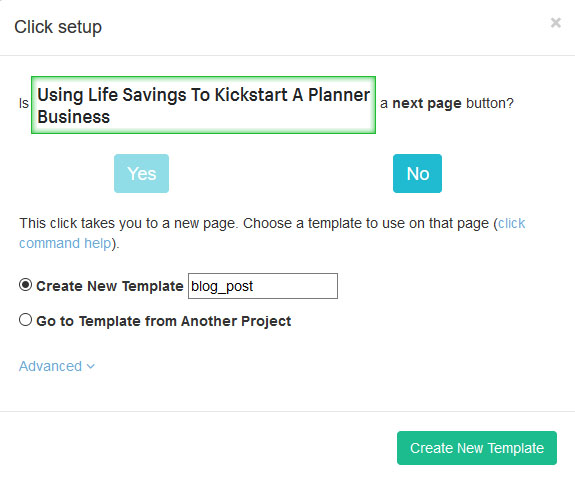
- Click on the PLUS (+) sign next to your “post” selection and choose the “Click” command.
- A pop-up will appear asking you if this is a “next page” link. Click on “No” and enter a name for your new template. In this case, we will call it “blog_post”. Lastly, click on the green “Create New Template” button.
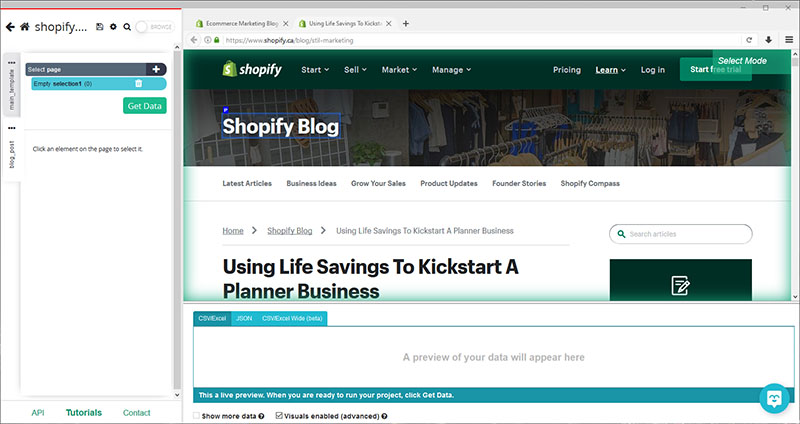
- The first blog post on the list will be rendered inside the app and a new select command will be created by default.
Extracting the Meta Title and Meta Description from each Page
We will now extract the meta title and meta description from each blog post we have selected.
First, we will inspect the code of the blog we are scraping to identify the two tags we want to extract.
In this case, we want to extract the <title> and <meta name=”description”> tags of each page.

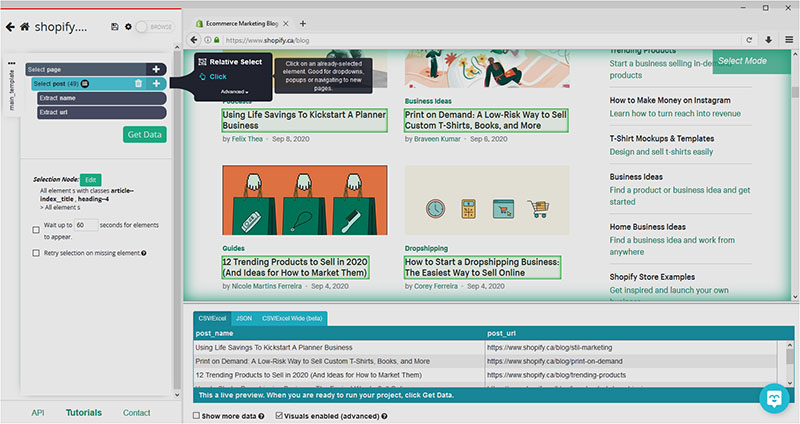
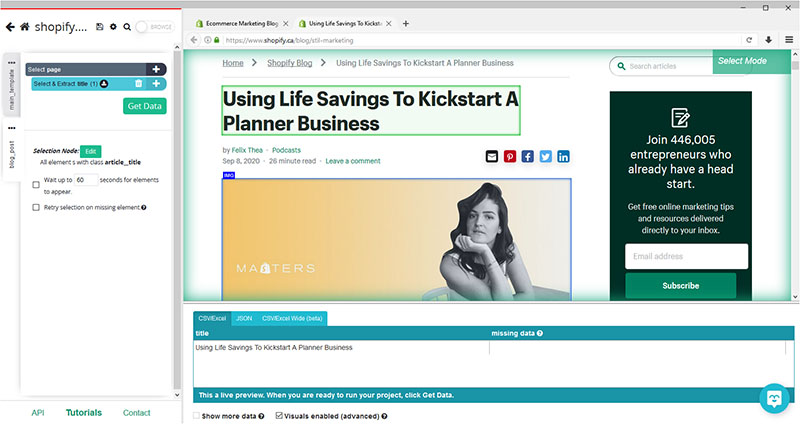
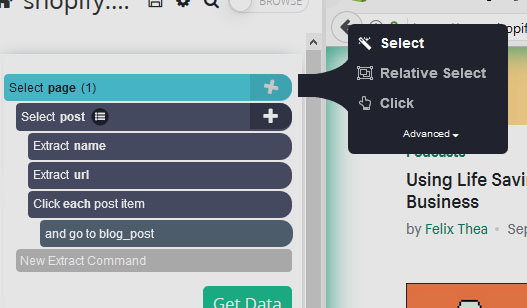
- Use the select command that was created by default on the previous step to select any element on the page. In this case, we will select the post’s headline. It will be highlighted in green to indicate it has been selected. Rename your selection to “title”.
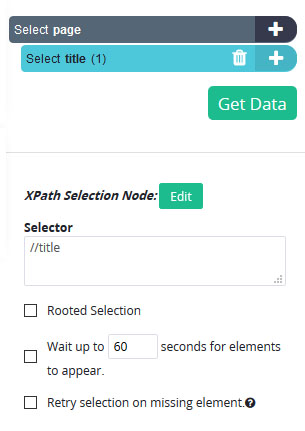
- Under your new selection, click on the “Edit” button next to “Selection Node” and choose the “use XPath selection” option.

- A new text field for a selector will appear, here we will ask ParseHub to extract the
tag of the page. To do this, we will enter this snippet in the text field: <b>//title</b>
- Now, click on the PLUS (+) sign next to your “title” selection, click on “Advanced” and choose the “Extract” command.
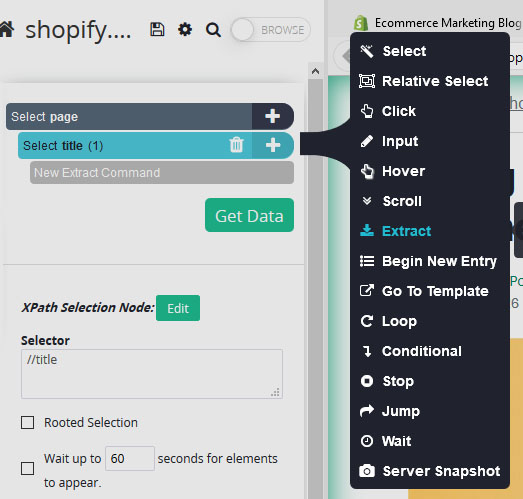
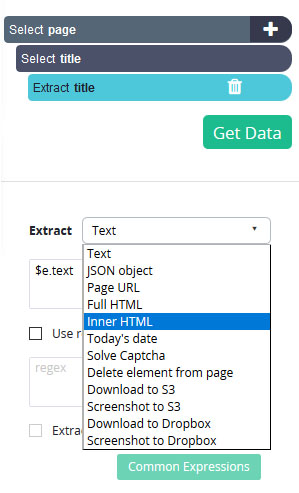
- Under your new “Extract” command, use the dropdown and select the “Inner HTML” option. ParseHub will now pull the meta title of each page.
- Now, click on the PLUS (+) sign next to your “page” command and add a new “select” command. With this select command repeat the steps 1-6 to extract the meta description for the page. For the Xpath command, use: //meta[contains(@name,'description')] since there are more than one meta fields. On the extract command dropdown, choose “content Attribute”.

Adding Pagination
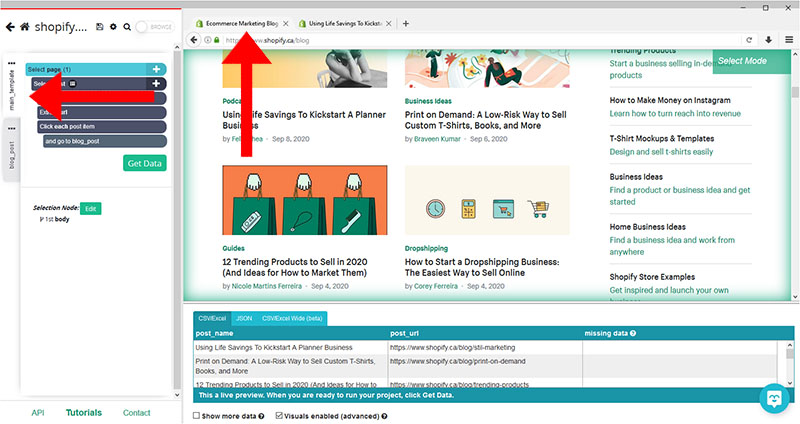
ParseHub is now pulling the Meta Title and Meta Description of each post on the first page of blog posts. Let’s now instruct ParseHub to extract additional pages of blog posts.
- Use the tabs on the left to return to your “main_template”. On the browser tabs, return to the main blog homepage.
- Click on the PLUS (+) sign next to your “page” selection and choose the Select command.
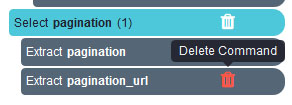
- Scroll all the way down to the bottom of the page and click on the “Next” link at the bottom of the page. Rename your selection to “pagination”
- Expand your “pagination” selection and remove the two extractions under it.
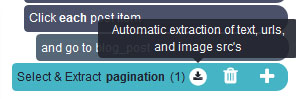
- Use the PLUS (+) sign next to your pagination selection and choose the click command.
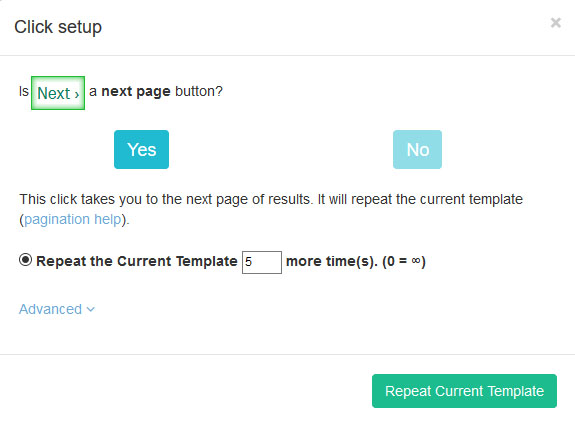
- A pop-up will appear asking you if this a next page button. Click on “Yes” and enter the number of times you’d like to repeat this process. In this case, will scrape 5 additional pages.
Running your Scrape
It’s now time to run your scrape job. Start by clicking on the green Get Data button on the left sidebar.
Here you can test, run or schedule your scrape. In this case, we will run the scrape right away.
ParseHub will now go and extract the data you’ve requested from the web. Once done, you will be able to download your data as a CSV or JSON file.
Closing Thoughts
You now know how to extract meta titles and meta descriptions from multiple pages on a website.
If you’re looking to complete this project from a list of URLs, check out our guide on extracting data from a list of URLs.
Happy Scraping!